Settings for Destiny 2, Increase FPS
In this guide, you’ll learn how to boost FPS and increase performance in Destiny 2. First, make sure Windows is fully up to date, then apply a few basic changes in the Windows gaming settings. You’ll also need to adjust GPU settings, Windows graphics settings, and the power plan. ISLC must be configured correctly as well. Finally, you’ll change in-game graphics settings to achieve the best FPS and overall performance.
Table of Contents
Windows Update / Settings
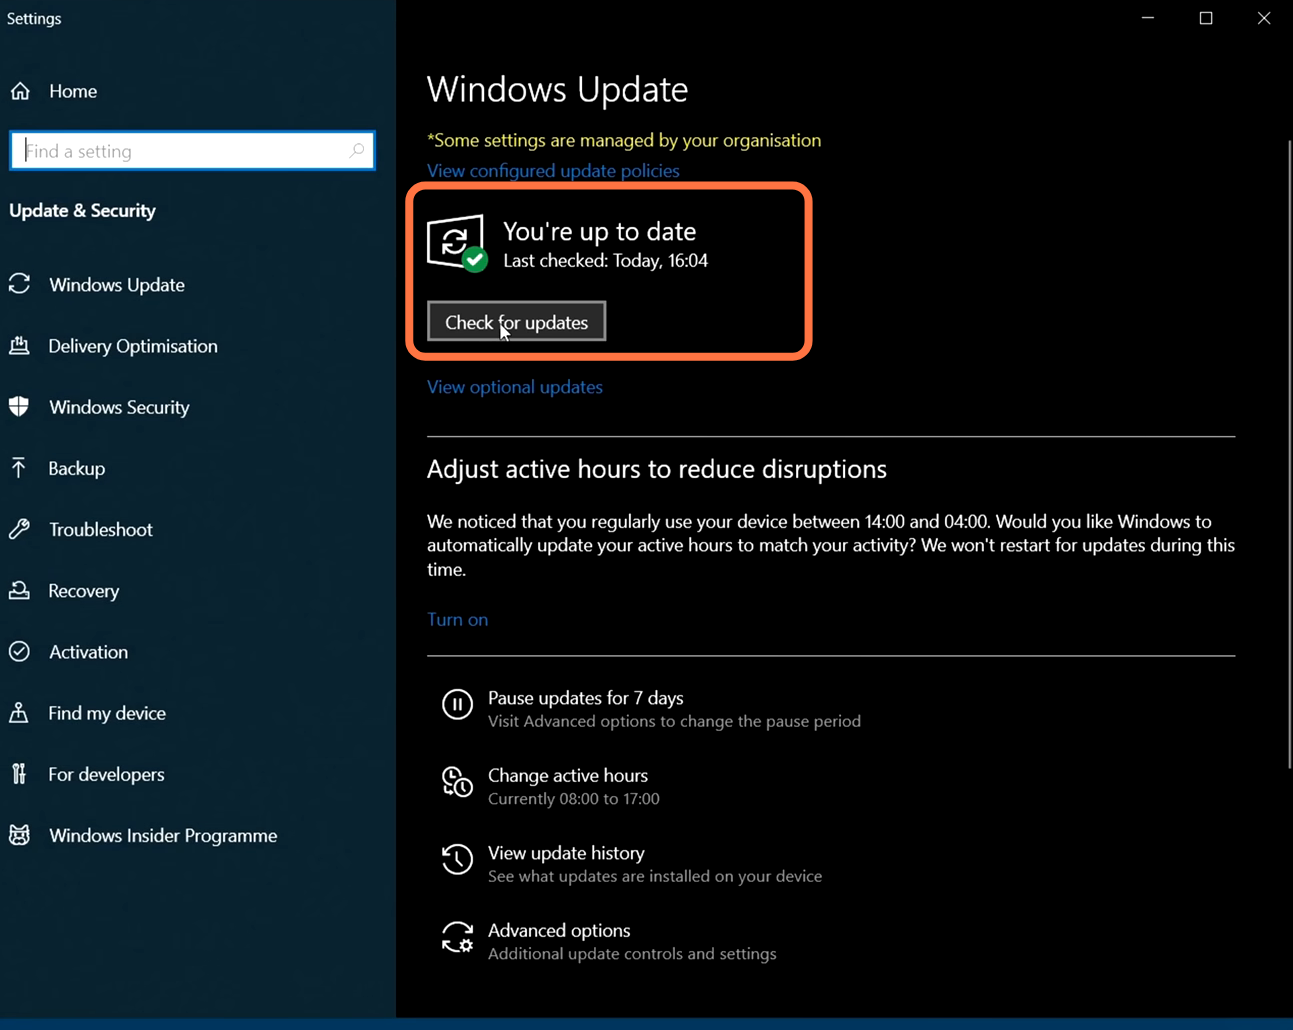
First, make sure your Windows installation is fully up to date. This is an important step, as updates can significantly improve system and game performance.
1.1 – Click the search icon in the bottom-left corner of your screen, type Update, and select Check for updates. A new window will open. Click Check for updates again to scan your system for available updates.
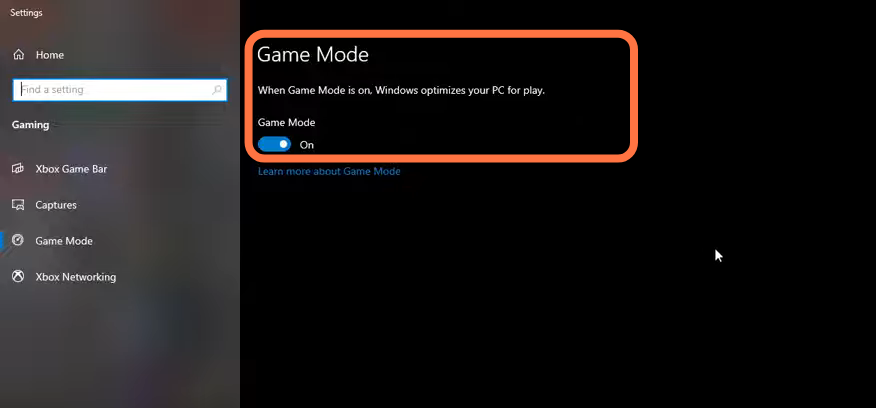
1.2 – Search for Game Mode in the search bar, press Enter, and make sure it is enabled. This ensures your system prioritizes game performance.
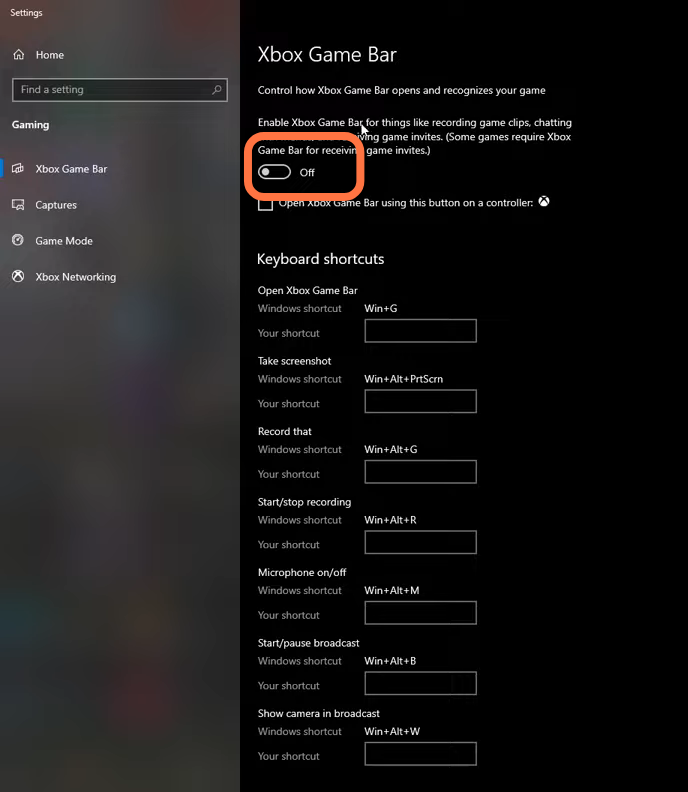
1.3 – Go to Xbox Game Bar under Gaming settings and disable it, as it can cause stuttering and crashes in some games.
1.4 – Open the Captures tab and make sure Background Recording and Recorded Audio are turned off.

1.5 – Enable hardware-accelerated GPU scheduling. This requires an NVIDIA 1000-series GPU or newer and can help reduce bottlenecks, providing a 2–5% FPS improvement.

Updating GPU Drivers
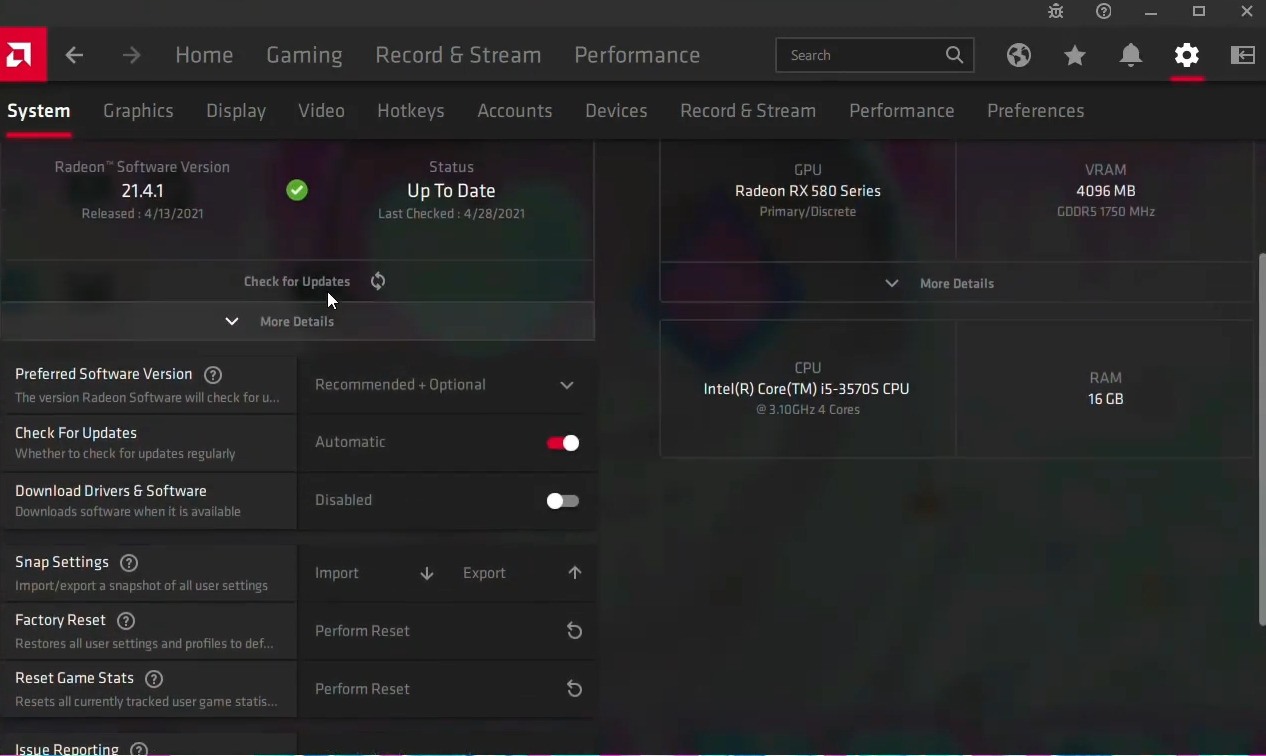
Make sure your GPU drivers and other essential drivers are up to date. There are two main ways to do this.
2.1 – Check for updates directly in your GPU control panel.
Outdated GPU drivers can negatively impact FPS and overall performance.
2.2 – Download the latest drivers directly from the GPU manufacturer’s website.
You can also download GPU management software from the link below to help keep drivers updated:
https://coderbag.com/product/quickcpu
Power Plan Settings
Power plans are an easy way to improve system performance by disabling sleep and low-power modes.
3.1 – Search for Edit power plan and press Enter. Open Power Options, click Show additional plans, and select the High performance power plan.

Next, search for Command Prompt, right-click it, and run it as administrator. Paste the following command and press Enter:
powercfg -duplicatescheme e9a42b02-d5df-448d-aa00-03f14749eb61
Afterward, close Command Prompt.

Return to Power Options and click the refresh icon. Select the Ultimate Performance power plan.

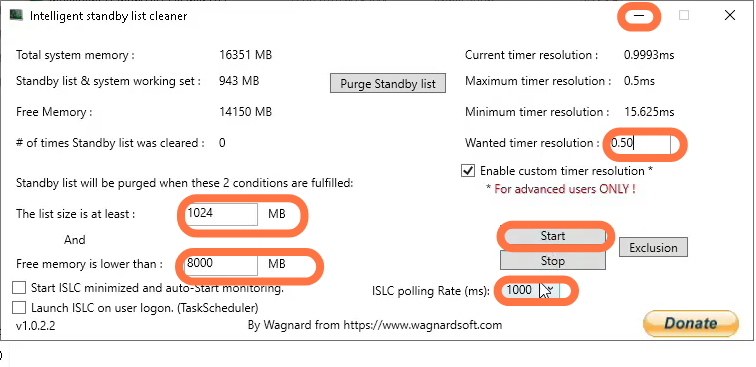
ISLC Setup
Download ISLC from the following link:
https://www.wagnardsoft.com/forums/vi...
Extract the files and run ISLC as administrator. Set the minimum size to at least 1024, and set free memory lower than half of your RAM. Set the custom timer resolution to 0.50 and the polling rate to 1000. Click Start and close the program once it finishes.
In-Game Settings
Launch Destiny 2, open Settings, and go to the Video tab. Set Window Mode to Fullscreen and choose your monitor’s native resolution. Turn off V-Sync and enable the frame rate cap. Set the frame rate to 168 and Field of View to 100.

Scroll down to Advanced Video Settings and set Graphics Quality to Custom. Turn off Anti-Aliasing or set it to FXAA. Disable Screen Space Ambient Occlusion and Texture Anisotropy. Set Texture Quality to Lowest, depending on your available VRAM. Set Shadow Quality to Low and disable Depth of Field.

Set Environmental Detail to Low and Character Detail to Medium. Set Foliage Detail Distance to Low, Foliage Shadow Distance to Medium, and Light Shafts to Medium. Disable Motion Blur and Wind Impulse. Under Additional Video settings, set Render Resolution to 100 and turn off HDR, Chromatic Aberration, and Film Grain.
