A JNI Error Has Occurred Please Check Your Installation - Minecraft 1.17
This guide provides the most reliable method to fix the “Minecraft 1.17 A JNI” error. The steps are explained below.
Step 1: First, close TLauncher.

Step 2: Go to your browser and open the following link.
https://www.oracle.com/java/technologies/javase-jdk16-downloads.html
Step 3: Scroll down until you find Windows x64 Compressed Archive in the Product/File Description section, then click on jdk-windows-x64_bin.zip.
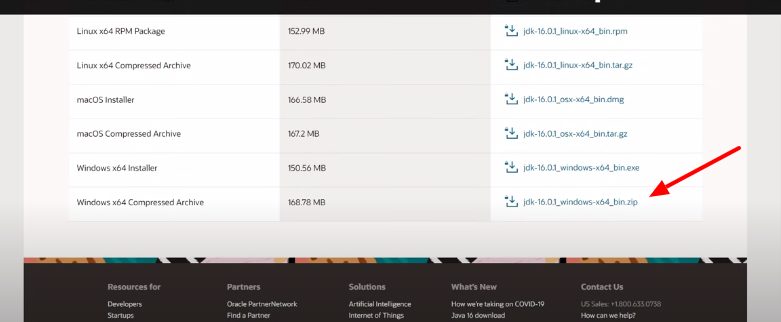
Step 4: Check the Oracle Technology Network License Agreement checkbox and click the Download button.

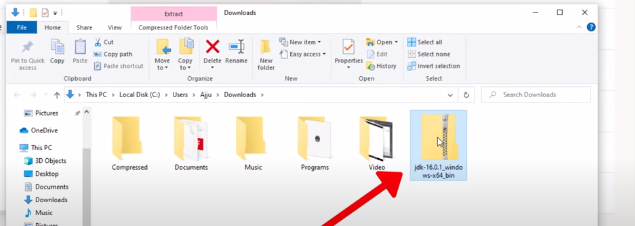
Step 5: Once the download is complete, click the downloaded file at the bottom of your browser and select Show in folder.

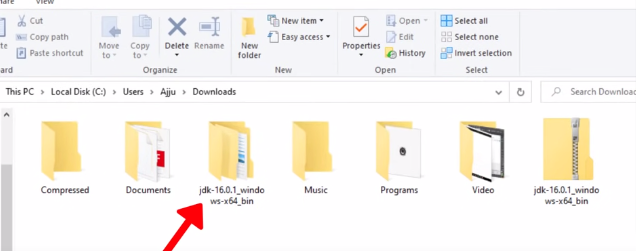
Step 6: Extract the downloaded file.
Step 7: Copy the extracted folder.
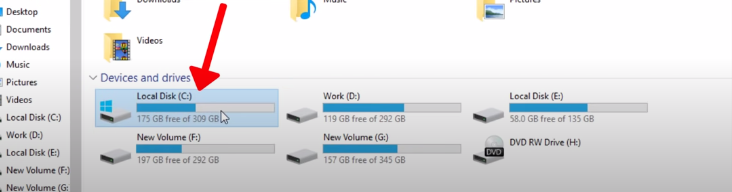
Step 8: Go to the C:/ drive.
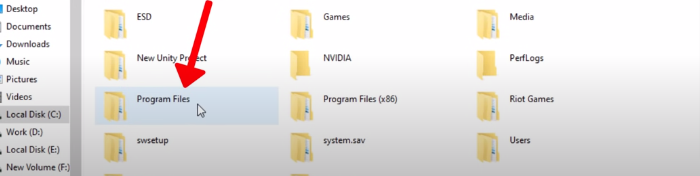
Step 9: Open the Program Files folder.
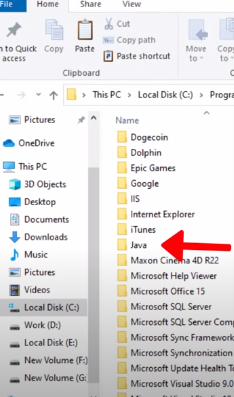
Step 10: Open the Java folder.
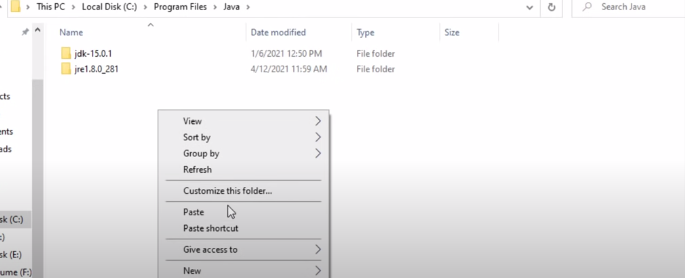
Step 11: Paste the copied folder here.
Step 12: Open TLauncher and go to settings by clicking the gear icon in the bottom-right corner.

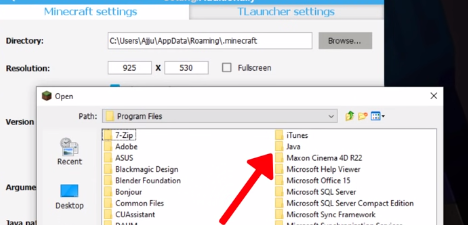
Step 13: Click the Browse option and select This PC from the left side.

Step 14: Open the C:/ drive.

Step 15: Open the Program Files folder.

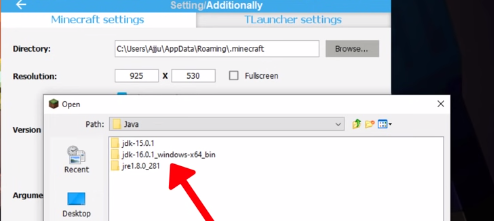
Step 16: Open the Java folder.
Step 17: Open the folder that was pasted earlier.
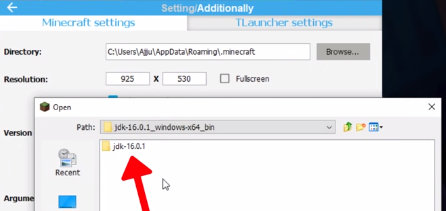
Step 18: Open the JDK folder.
Step 19: Open the bin folder.
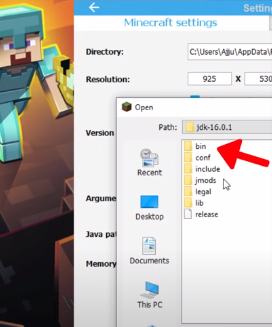
Step 20: Locate the javaw.exe file.
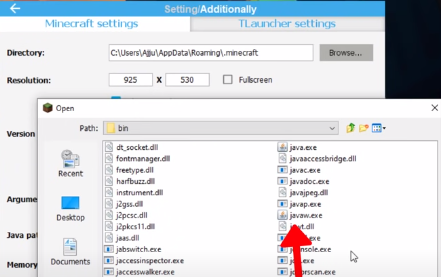
Step 21: Click Open.

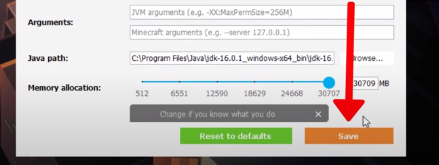
Step 22: Click the Save option.
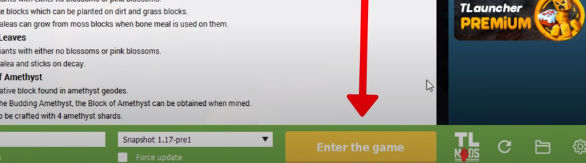
Step 23: Click Enter the game.
The error should now be resolved, and you can play the game without any issues.